If you've been scrolling social media lately, you've probably seen the 'pixel stretch trend' all over your feed. If you don't recognize it by name, this trend does exactly what it suggests: it stretches a slice of pixels from a photograph to create a dynamic sense of motion – and even leading lines.
This isn't the first time the pixel stretch trend has done the rounds on social media. It first surfaced back in 2008, then it appeared again about four years ago. Now it's back a third time, thanks to Gen Z, and if you want to get in on the trend all you need is a photo editor like Photoshop.
It helps to have an image where your subject – specifically its color palette – is distinct from the scenery, as the effect will be far more pronounced than if the subject blends into the background.
The pixel stretch trend works with everything from landscapes to street photography, provided there's a sizeable subject or object to work with. I'm going to use one of my portraits for this example, which I'll edit in Photoshop – but the principles are the same whichever app you're using.
How to do the pixel stretch trend
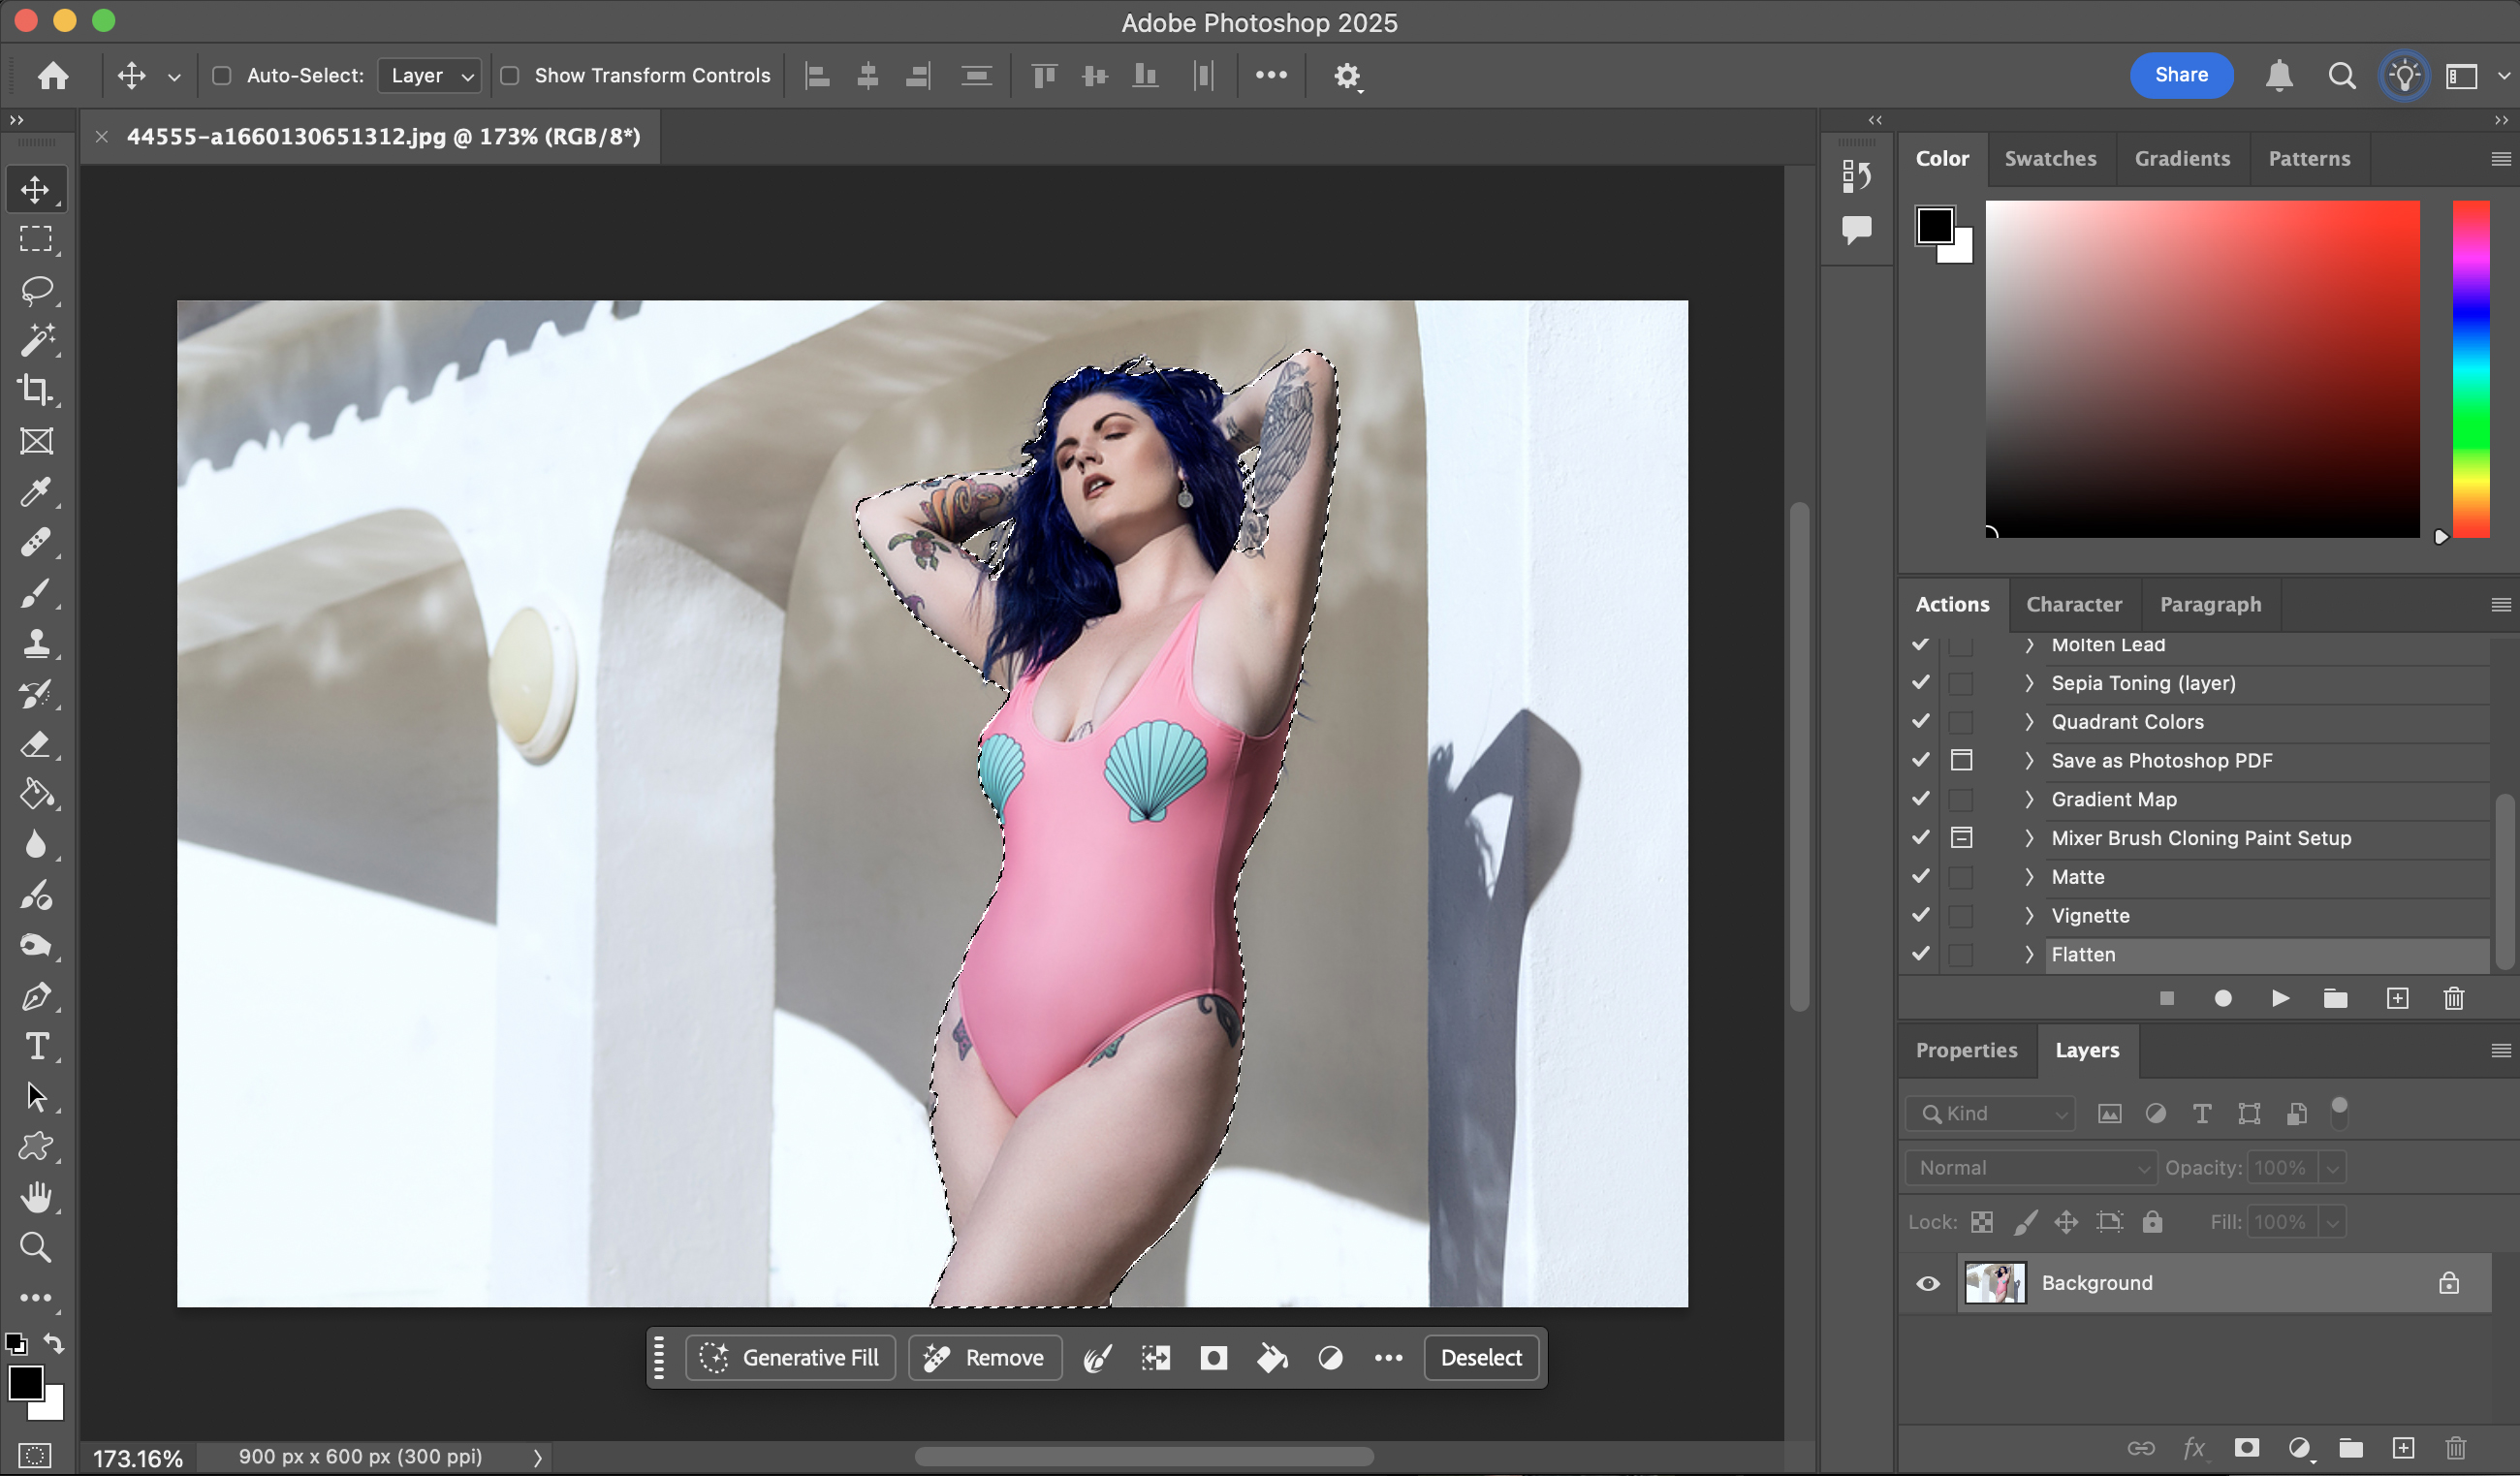
1) Separate your subject
Use whatever tool does the best job or that you're most comfortable using. Photoshop's Select subject button does a pretty good job, but feel free to go freehand, use the Magnetic Lasso Tool or anything else that gets the job done. Once you've selected your subject, hit Ctrl+J on a PC or Cmd+J to duplicate it as a new layer.
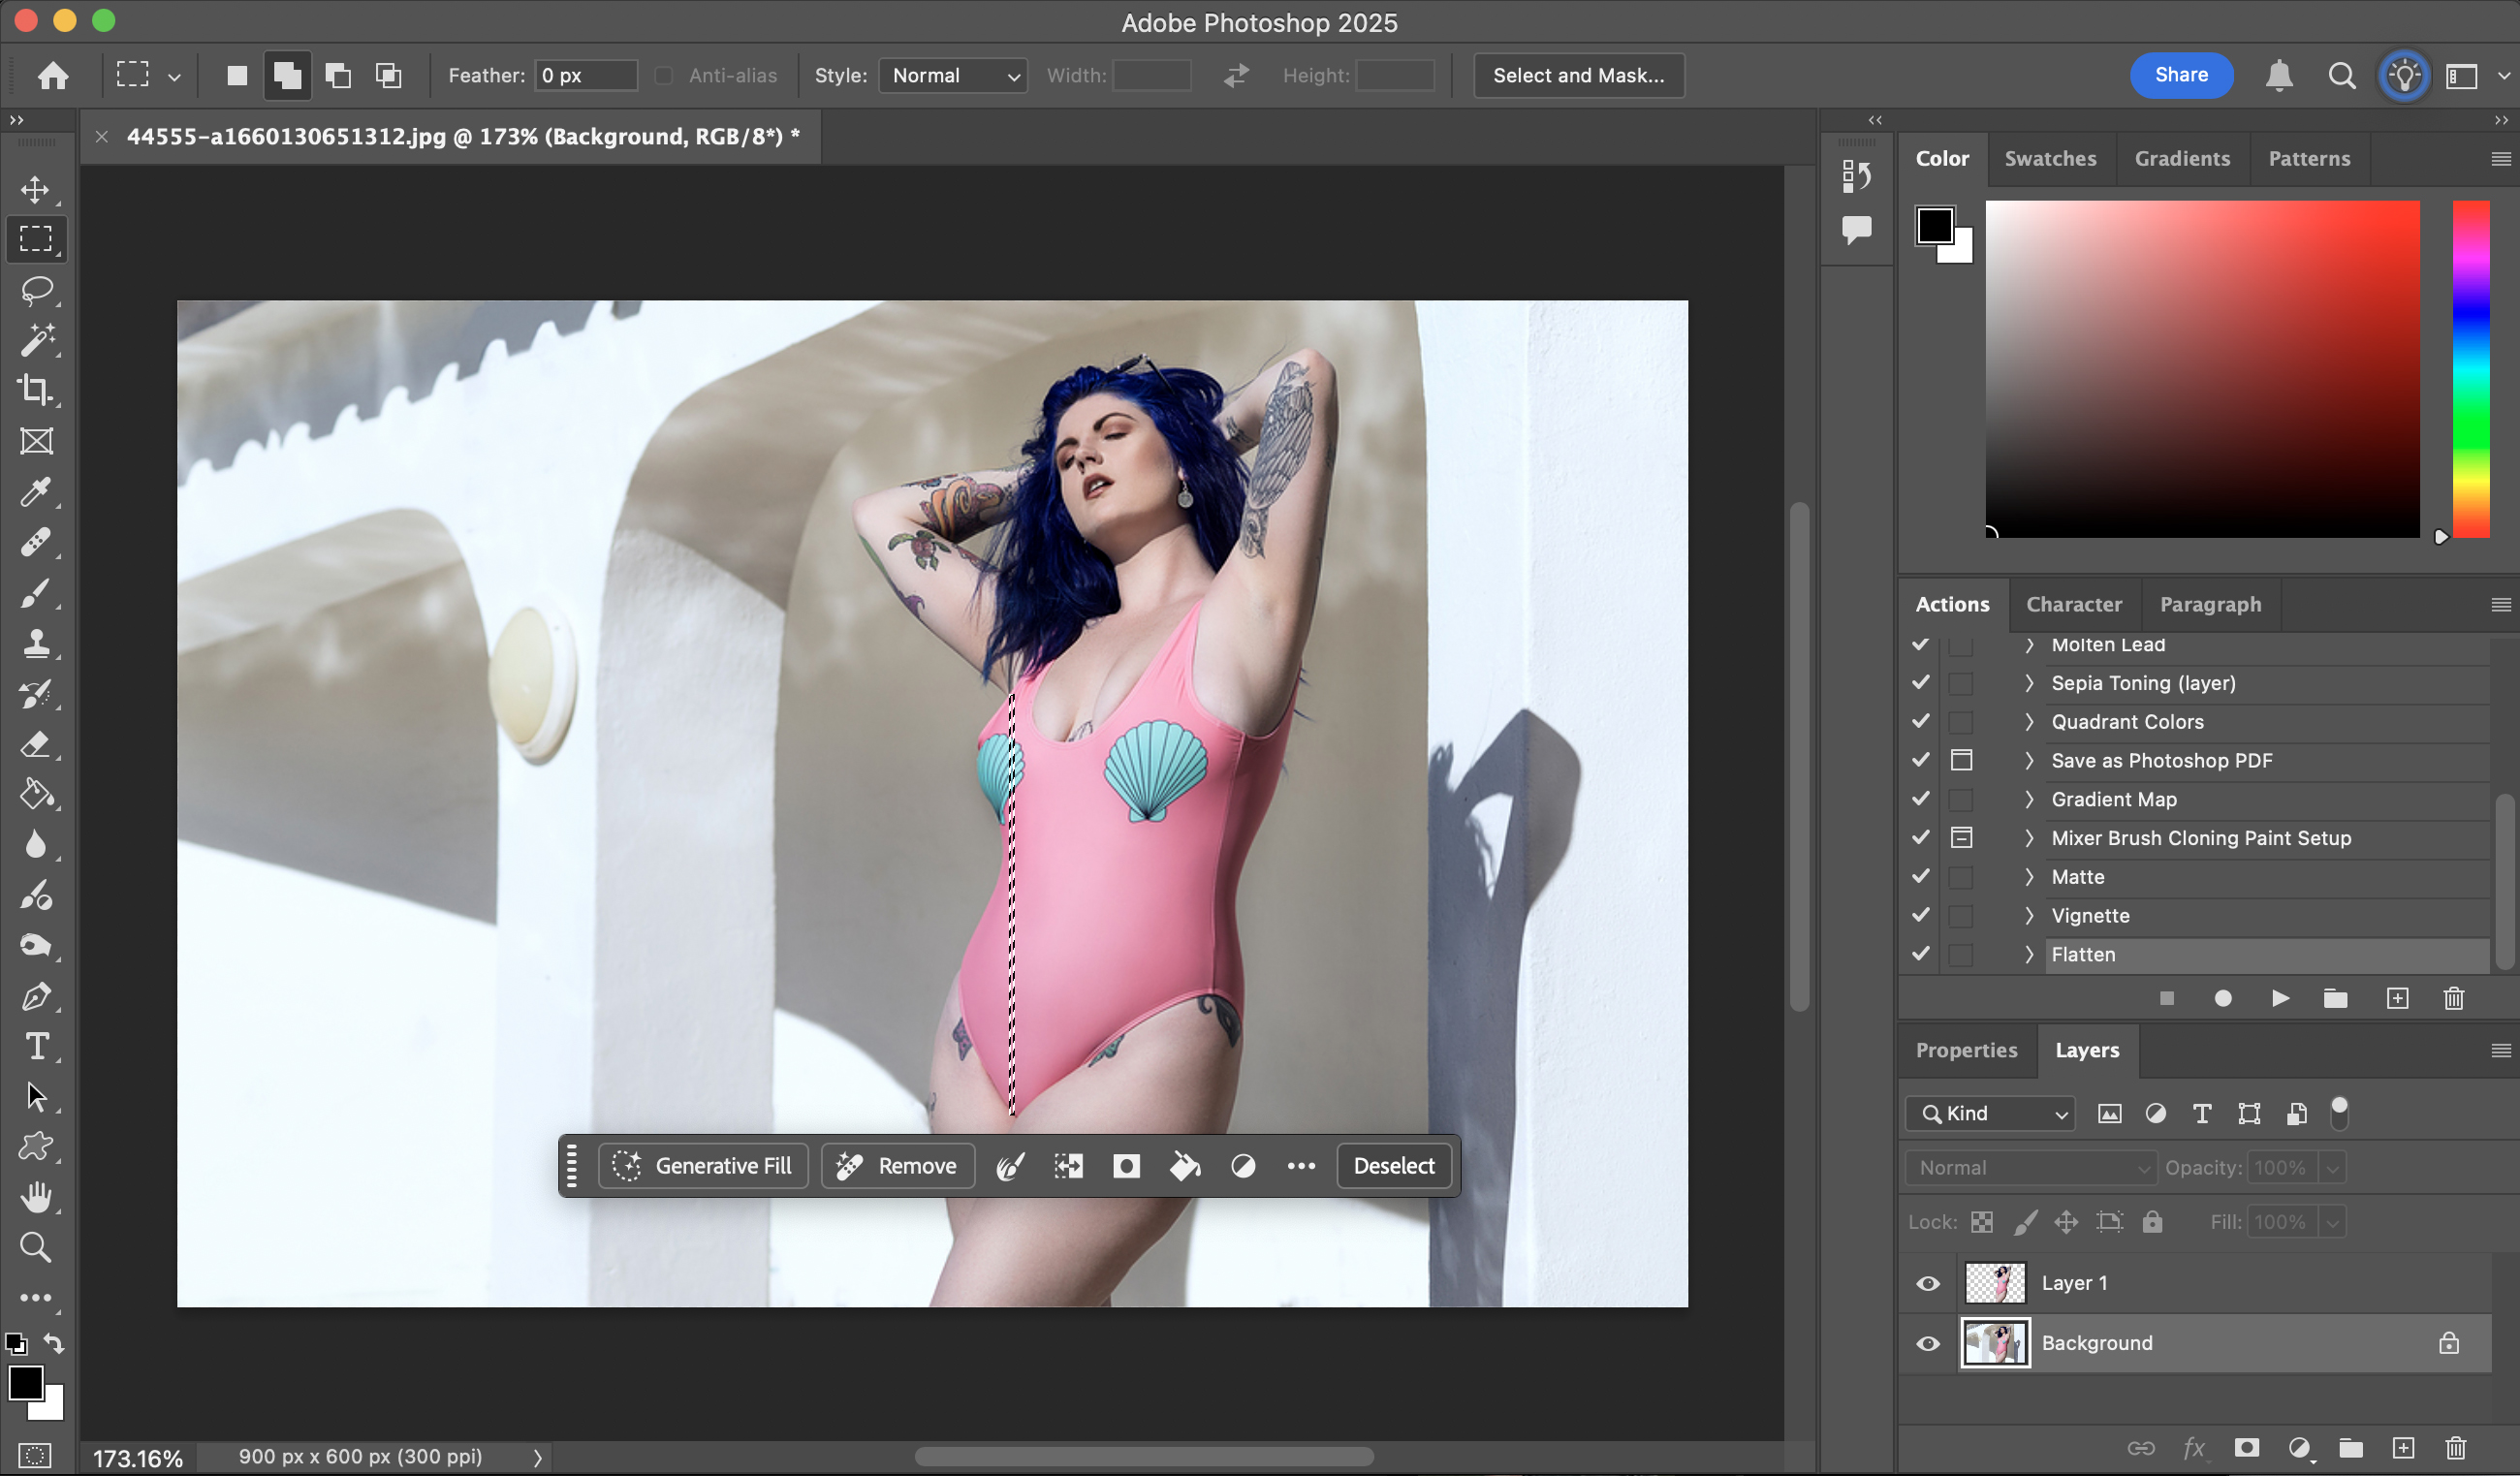
2) Create a pixel strip
On the background layer, use the Rectangular Marquee Tool to create a thin strip down the edge (or close to it, if the edge of your subject is uneven). Then hit Crtl/Cmd +J to duplicate it to a new layer, which should be sitting beneath the subject layer you created in step 1. If you want to, you can repeat this process on the same or different parts of your image.
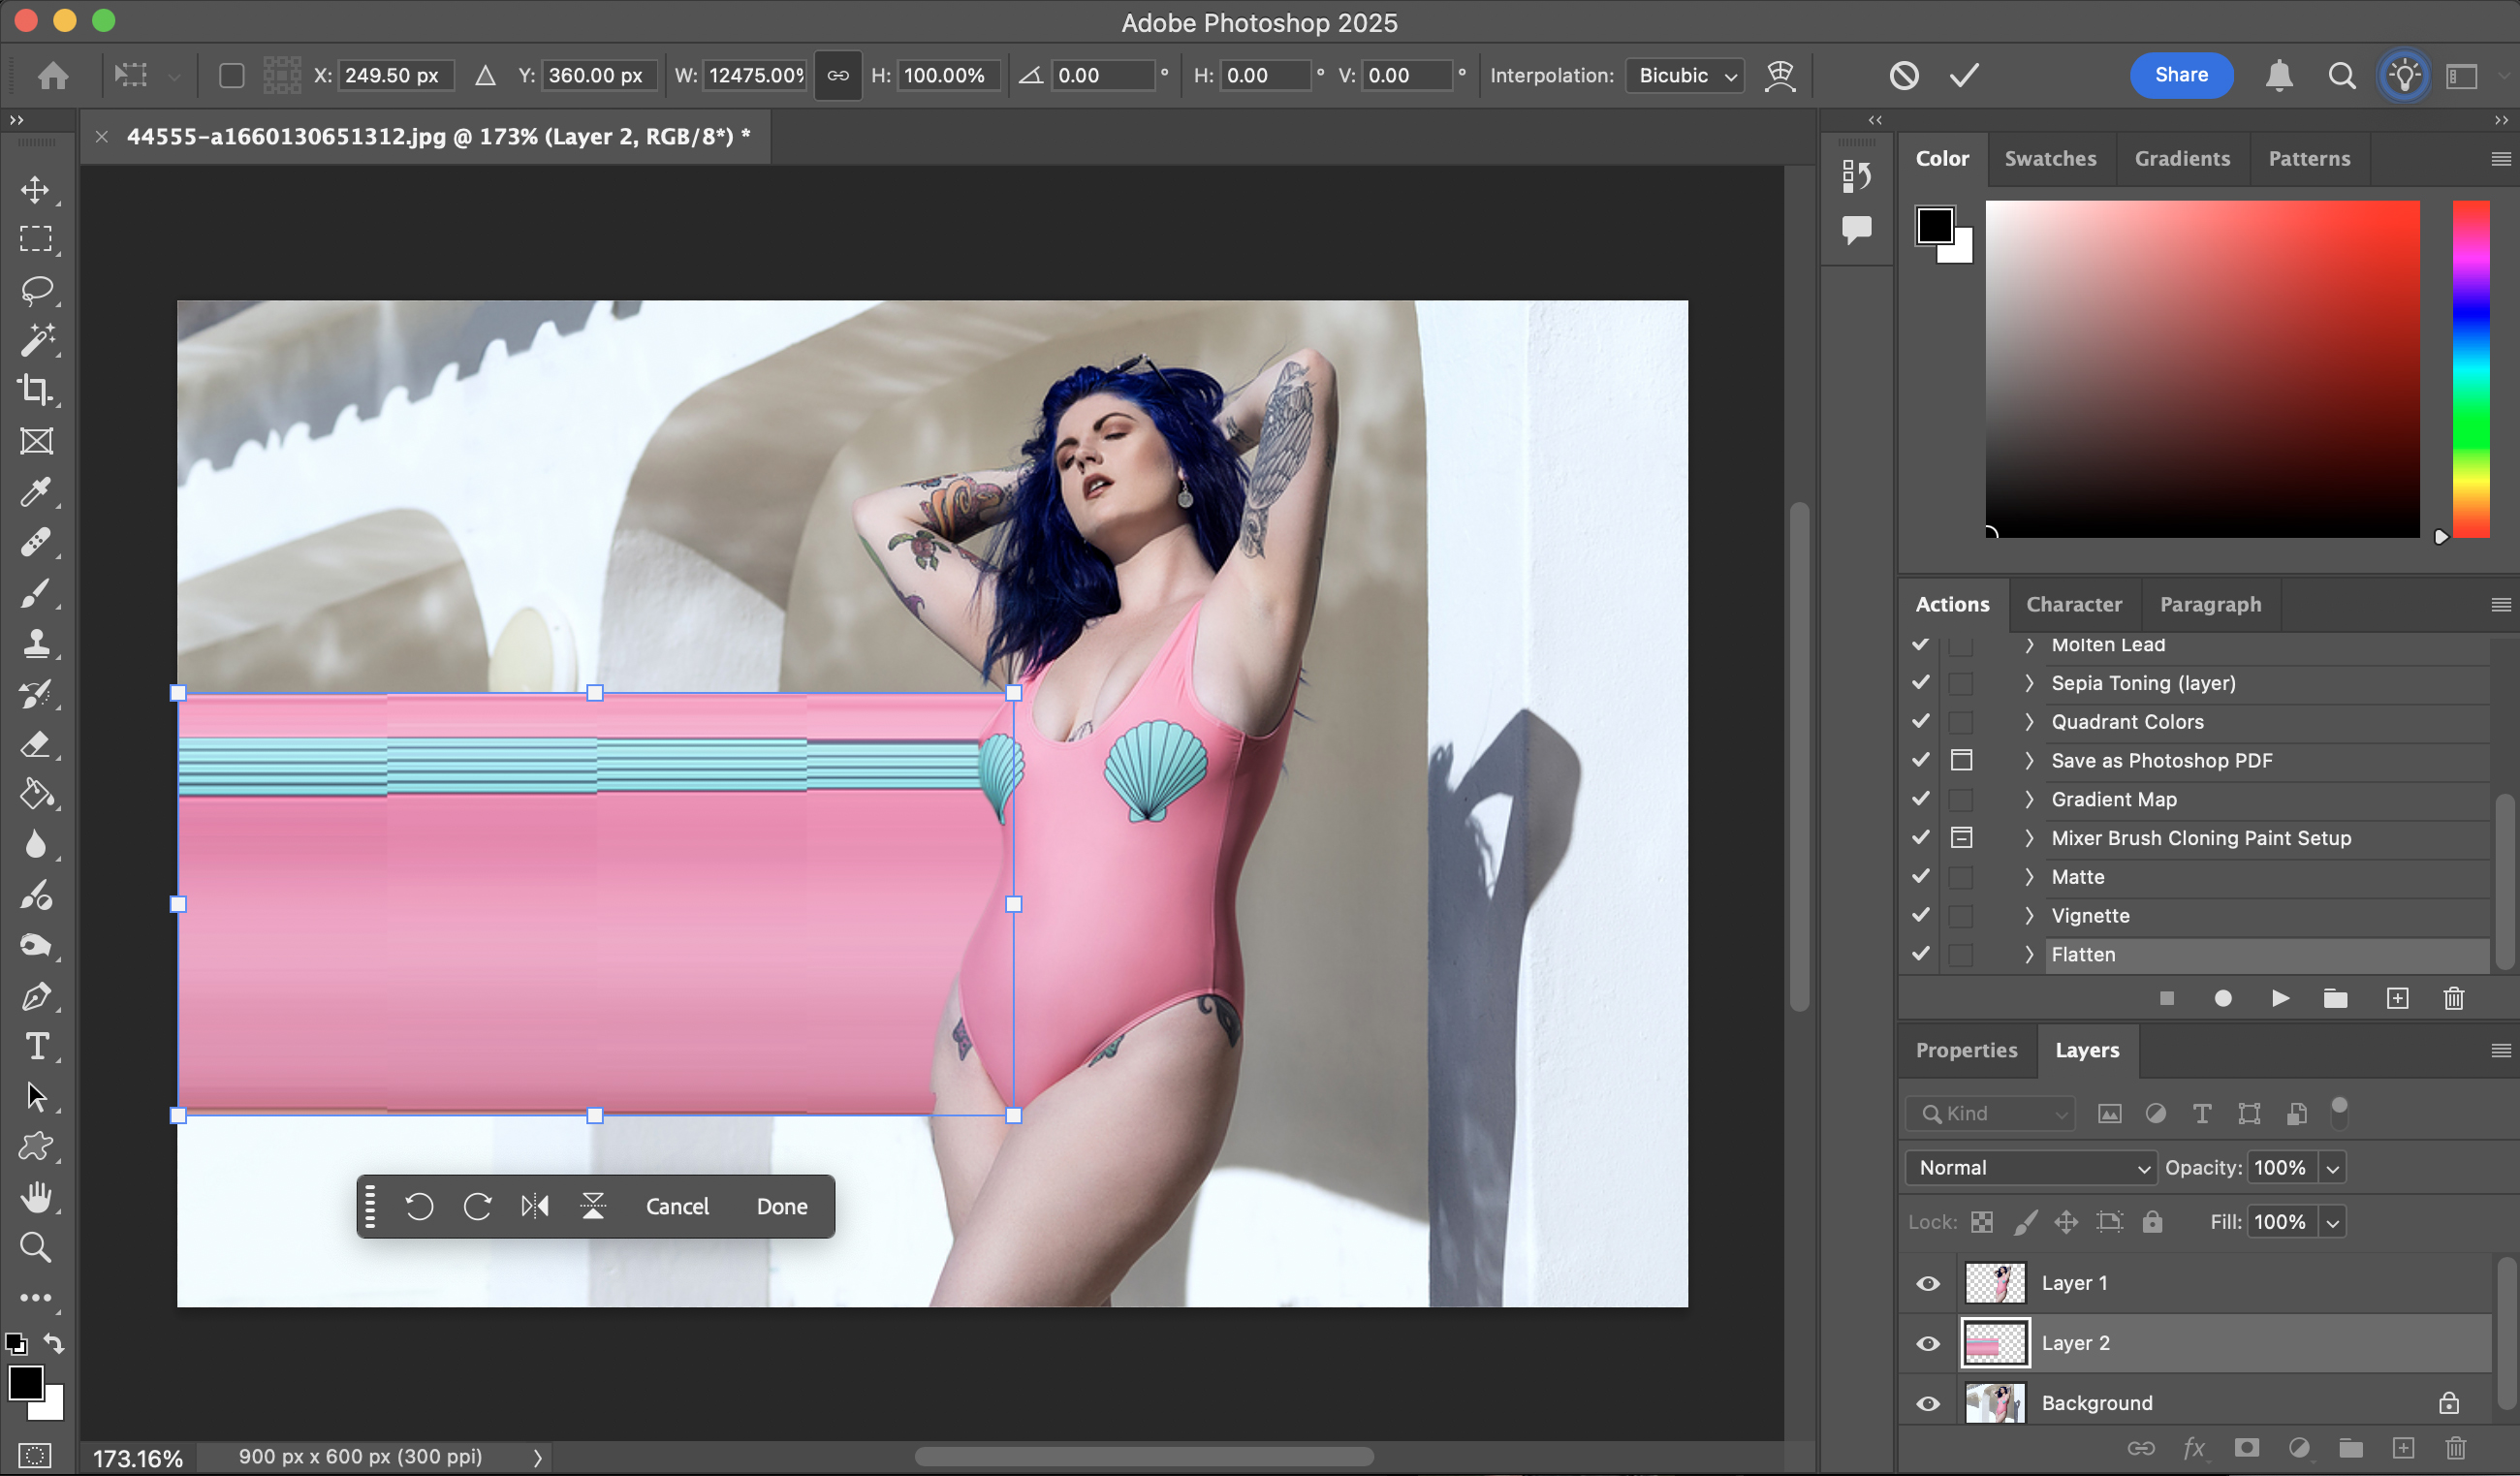
3) Stretch your strip
Hit Ctrl/Cmd +T to activate Free Transform, which will give you a bounding box with transform points around the strip. Click and hold the middle point and simply drag it to the edge of the image to stretch it out. (You might need to hold the Shift key while you do this, if dragging this point stretches the subject in all directions.)
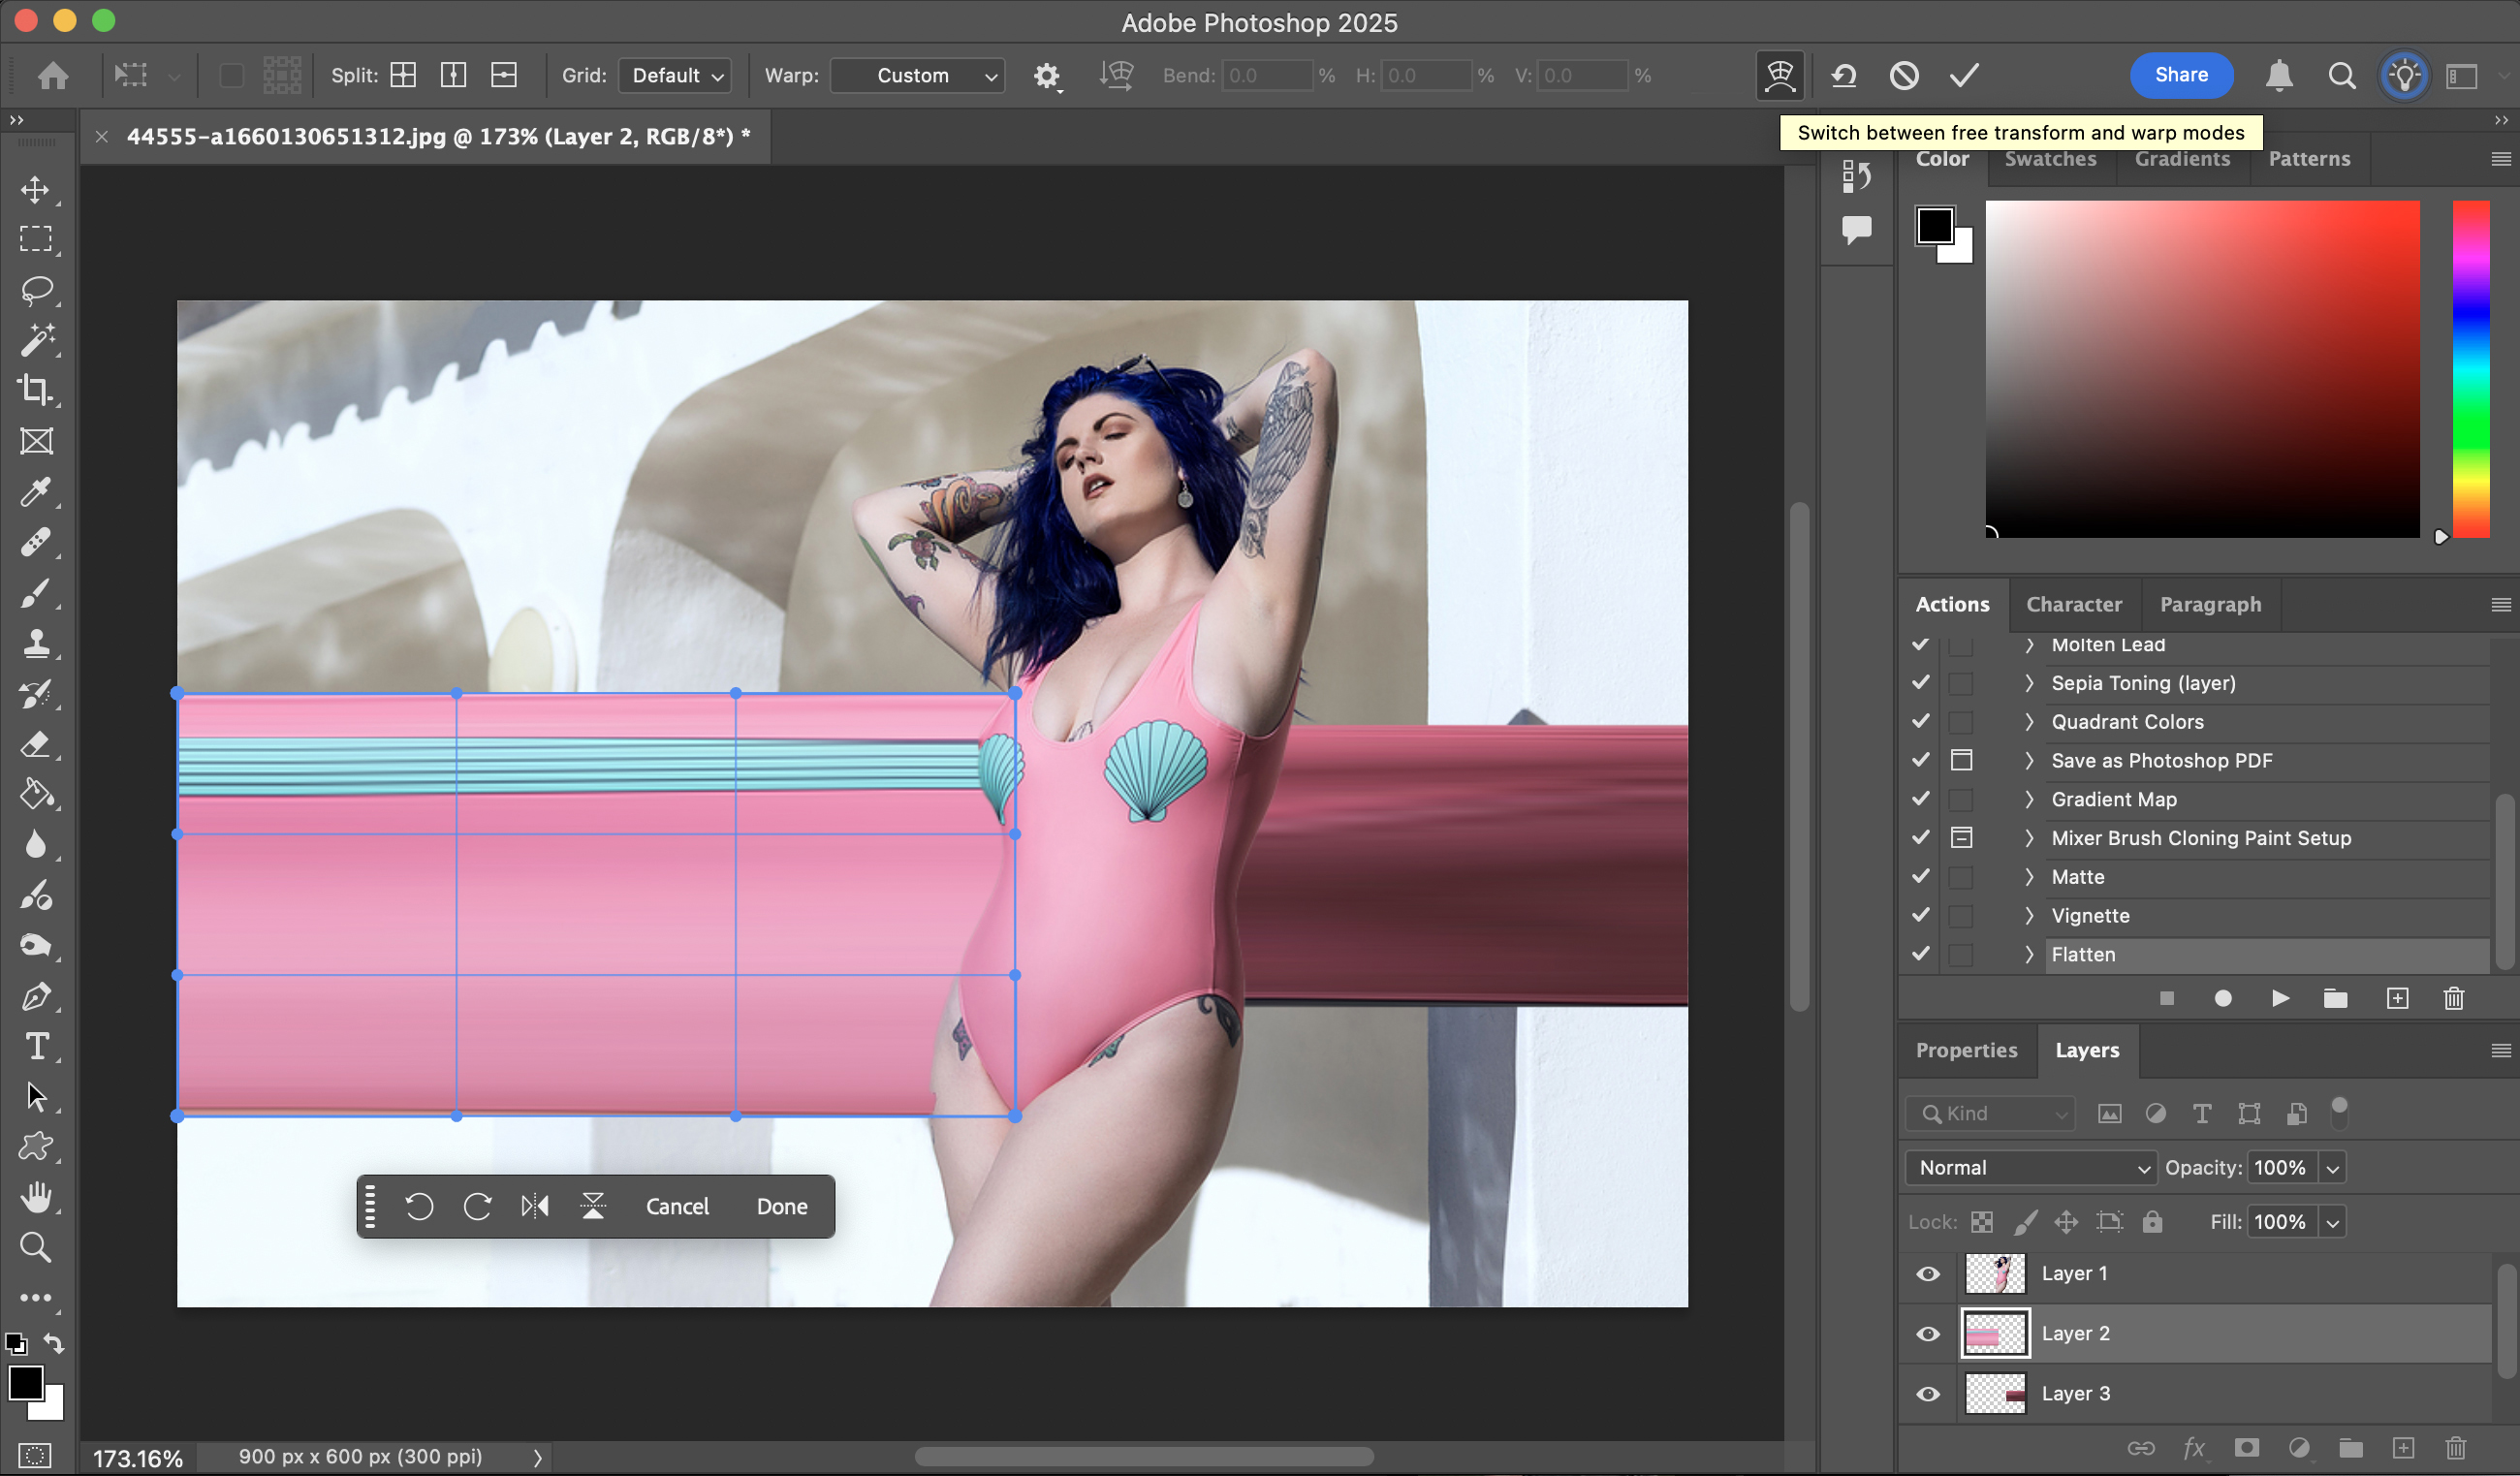
4) Switch to Warp
For some images – such as those with a flat or geometric subject – a simple, straight pixel stretch might be all you want. But to create dynamism, there's more to the process. While in Free Transform mode, click the icon indicated in the image above to switch into Warp mode. Alternatively, with your stretched pixel layer selected, go to Edit > Transform > Warp.
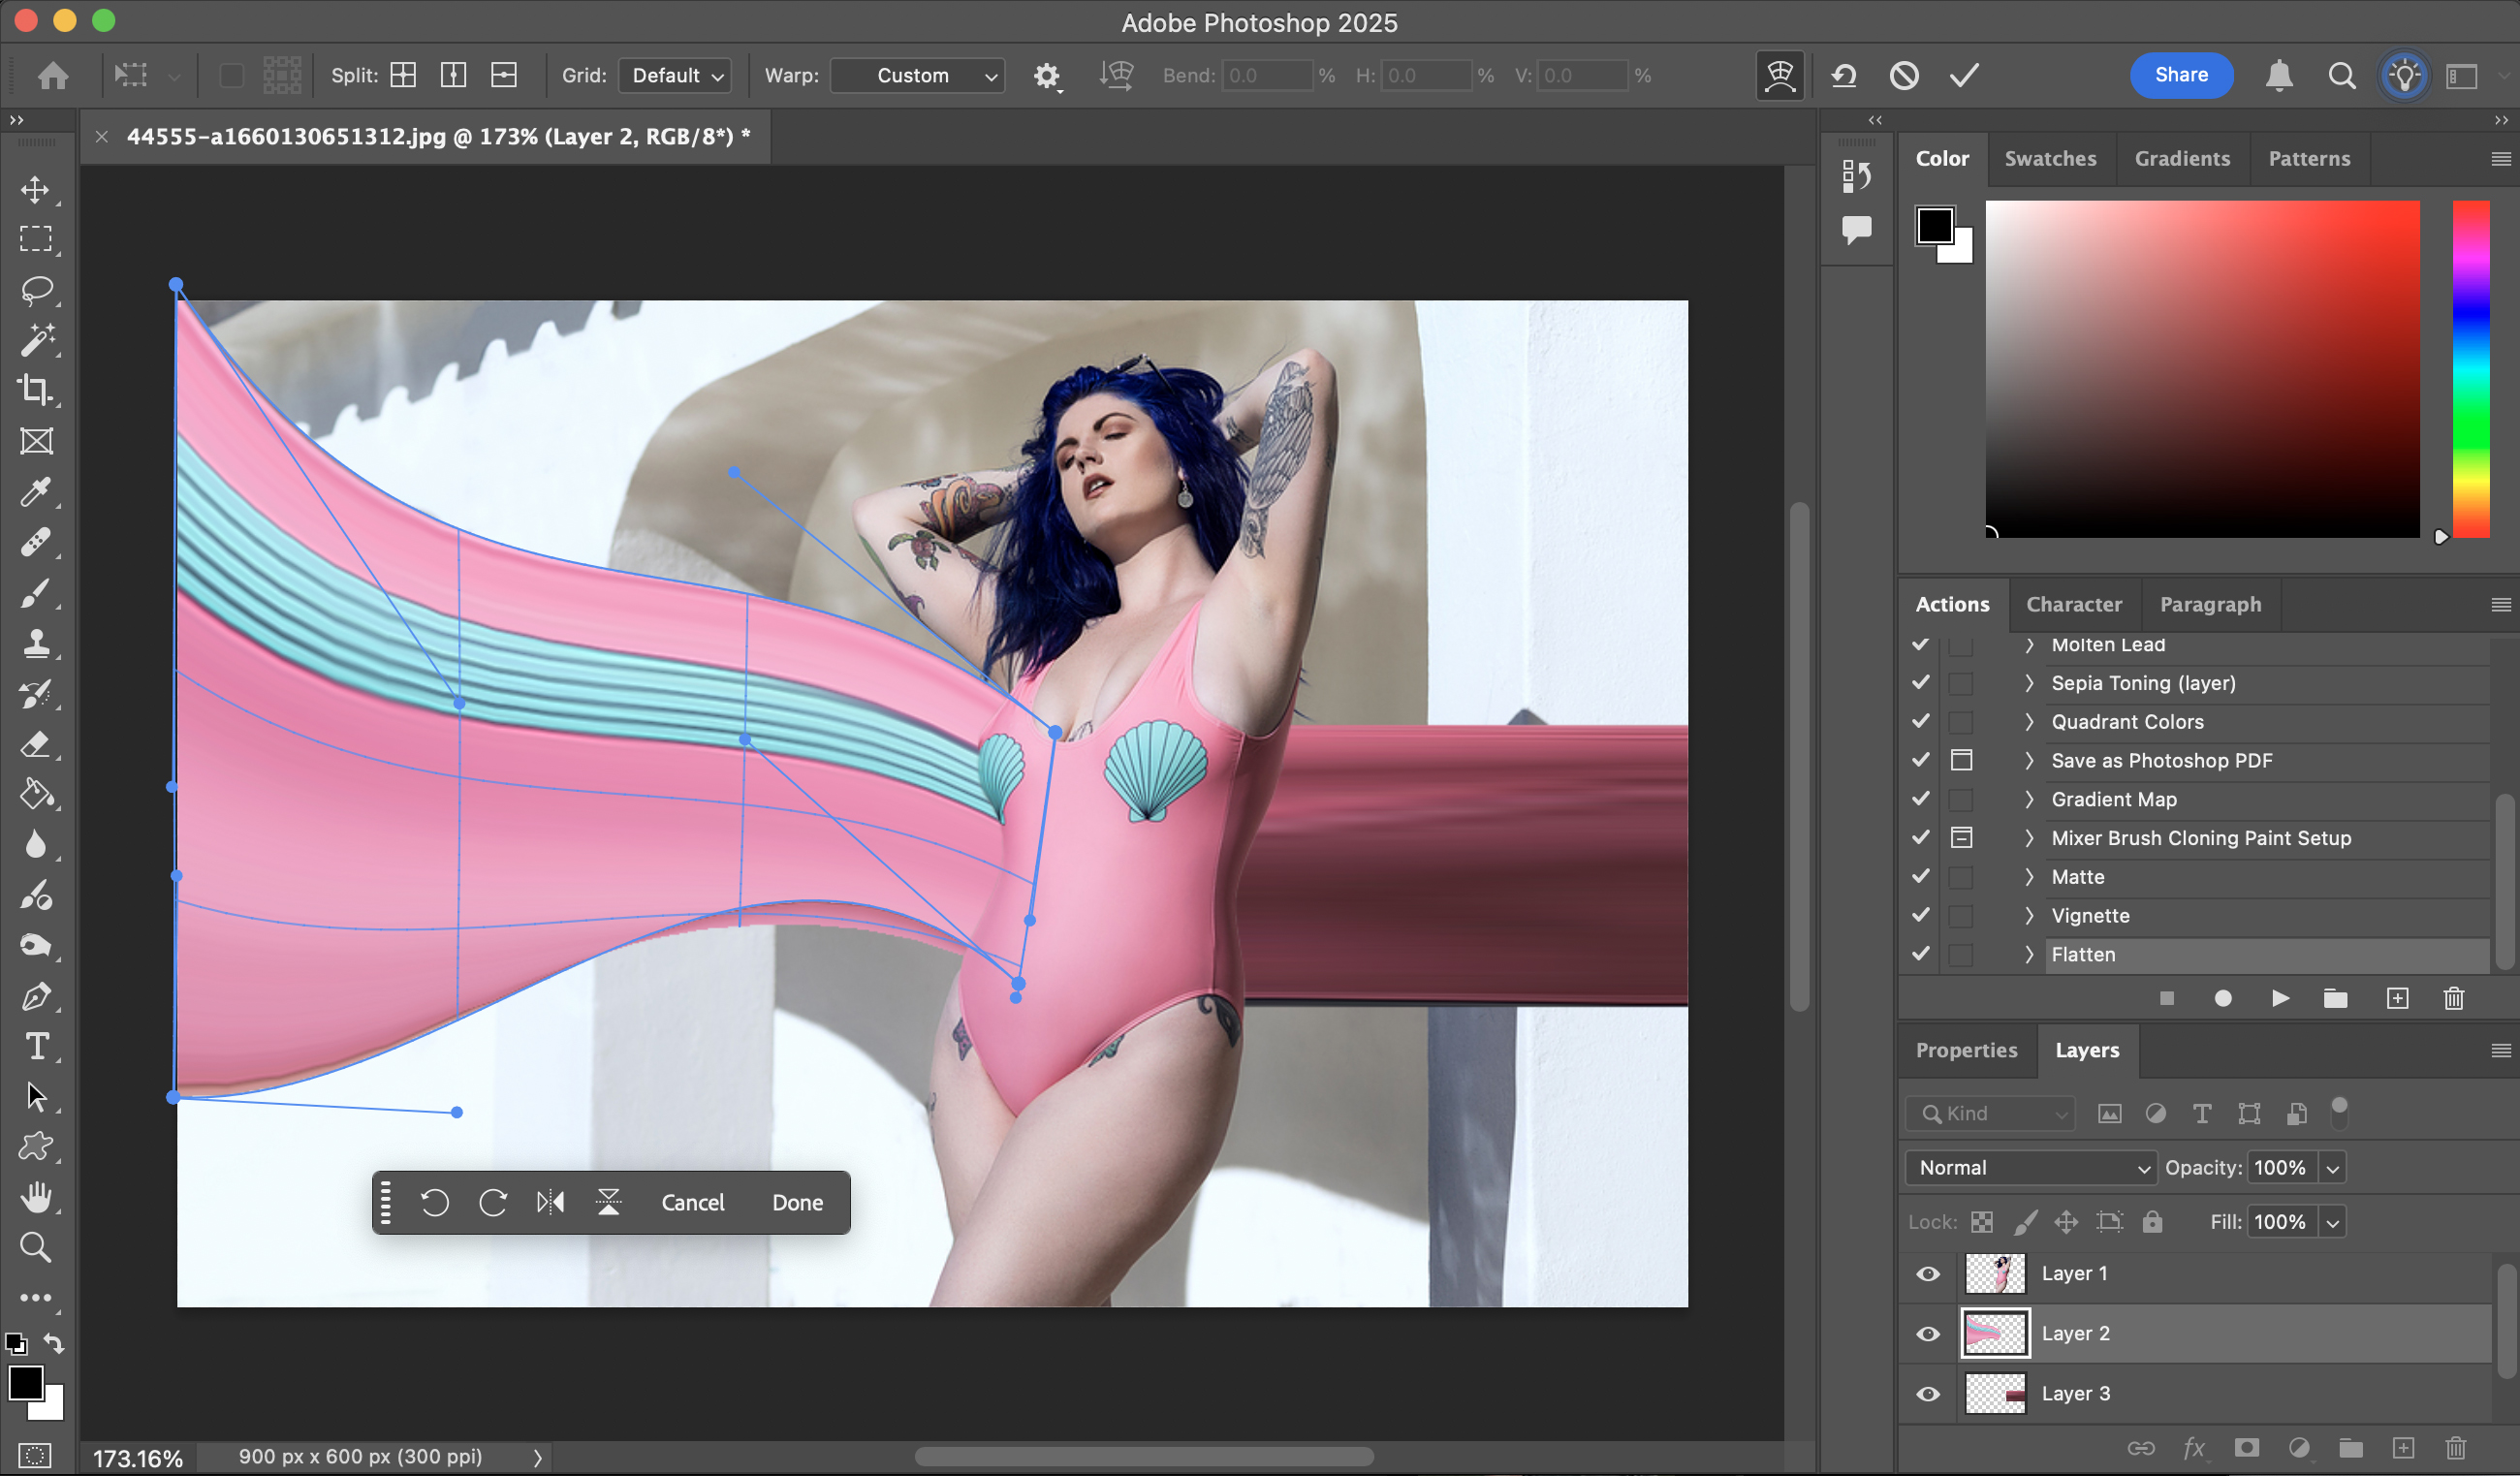
5) Warp 9, engage!
Now you can get creative! Using the anchor points you can drag, stretch and twist your stretched pixel strip. There are no hard and fast rules here; your shapes can be subtle or spectacular. The only thing to bear in mind is keeping colors or other characteristics in line with their source points on your subject, to support the illusion that its individual pixels are being stretched from their origins.
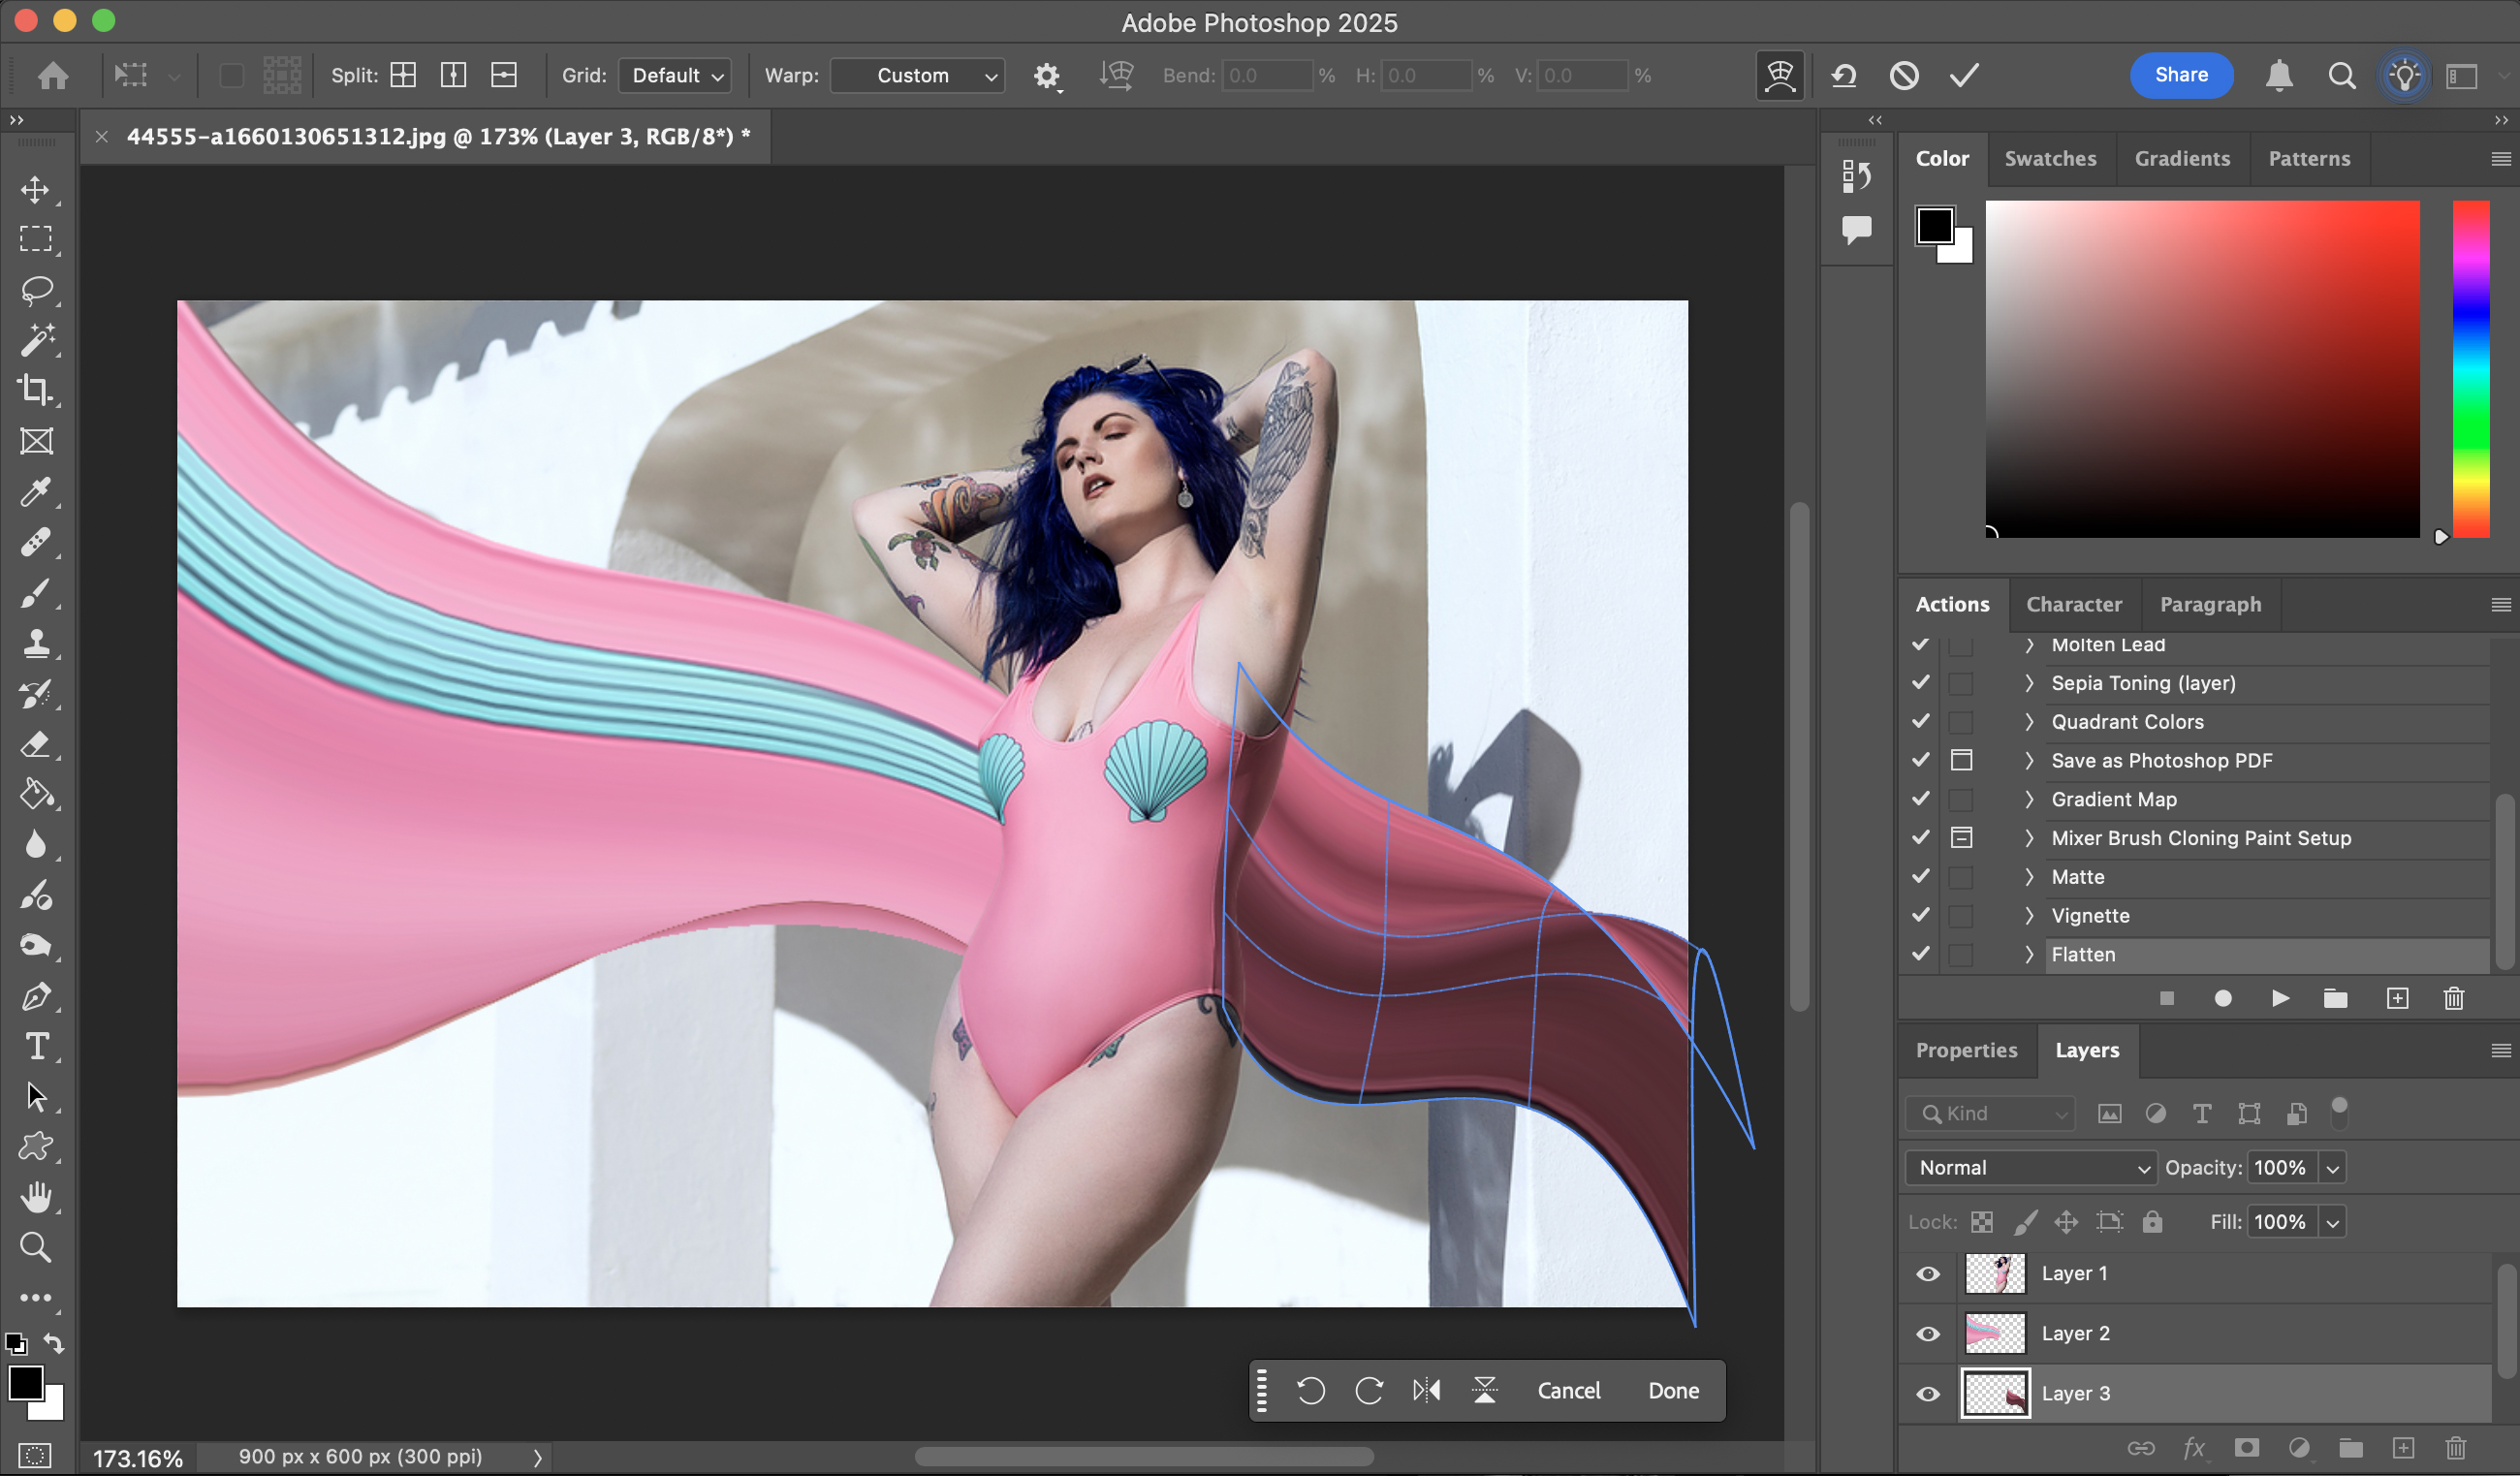
6) Complementary stretches
If you're adding more than one pixel stretch element, make sure that they complement one another – or, at the very least, that they don't clash. You can use them to create leading lines, to help guide the viewer's eyes around the image, and you can even use the Dodge and Burn Tools to lighten and darken the image to create more depth and dimension. Just experiment and see what works best. Have fun!

You might also like…
Not comfortable with Photoshop? Take a look at the best Photoshop alternatives, along with the best photo editing software and the best free photo editing software.